I wanted to make a tree skirt for my son and DIL for their new home. I found lots of pictures and plans, but nothing quite what I wanted it to look like. I had a picture in my head. (of course!!) I wanted it round, with pie shaped pieces of different fabric, maybe with a scalloped outer edge.
I hate to sound like the Grinch...but I am not really a Christmas person (sorry)..so didn't really like all the really Christmassy fabric, BUT...I saw this...and it was perfect!!

So then on to the planning stage! As I lay in bed one night I realized that the math was really pretty simple. If you cut a circle into 4...you have a 90 degree corner in the middle..divided into half makes a 45 degree corner and 4 wedges on each half of the circle.
If I wanted 3 wedges on each side....that would make each corner 60 degrees instead of 45 degrees, or I could make 6 wedges of 30 degrees! (easy peasy...right)

I know this is probably pretty obvious to most of you...but it was a true moment of clarity when I realized how simple it really was.
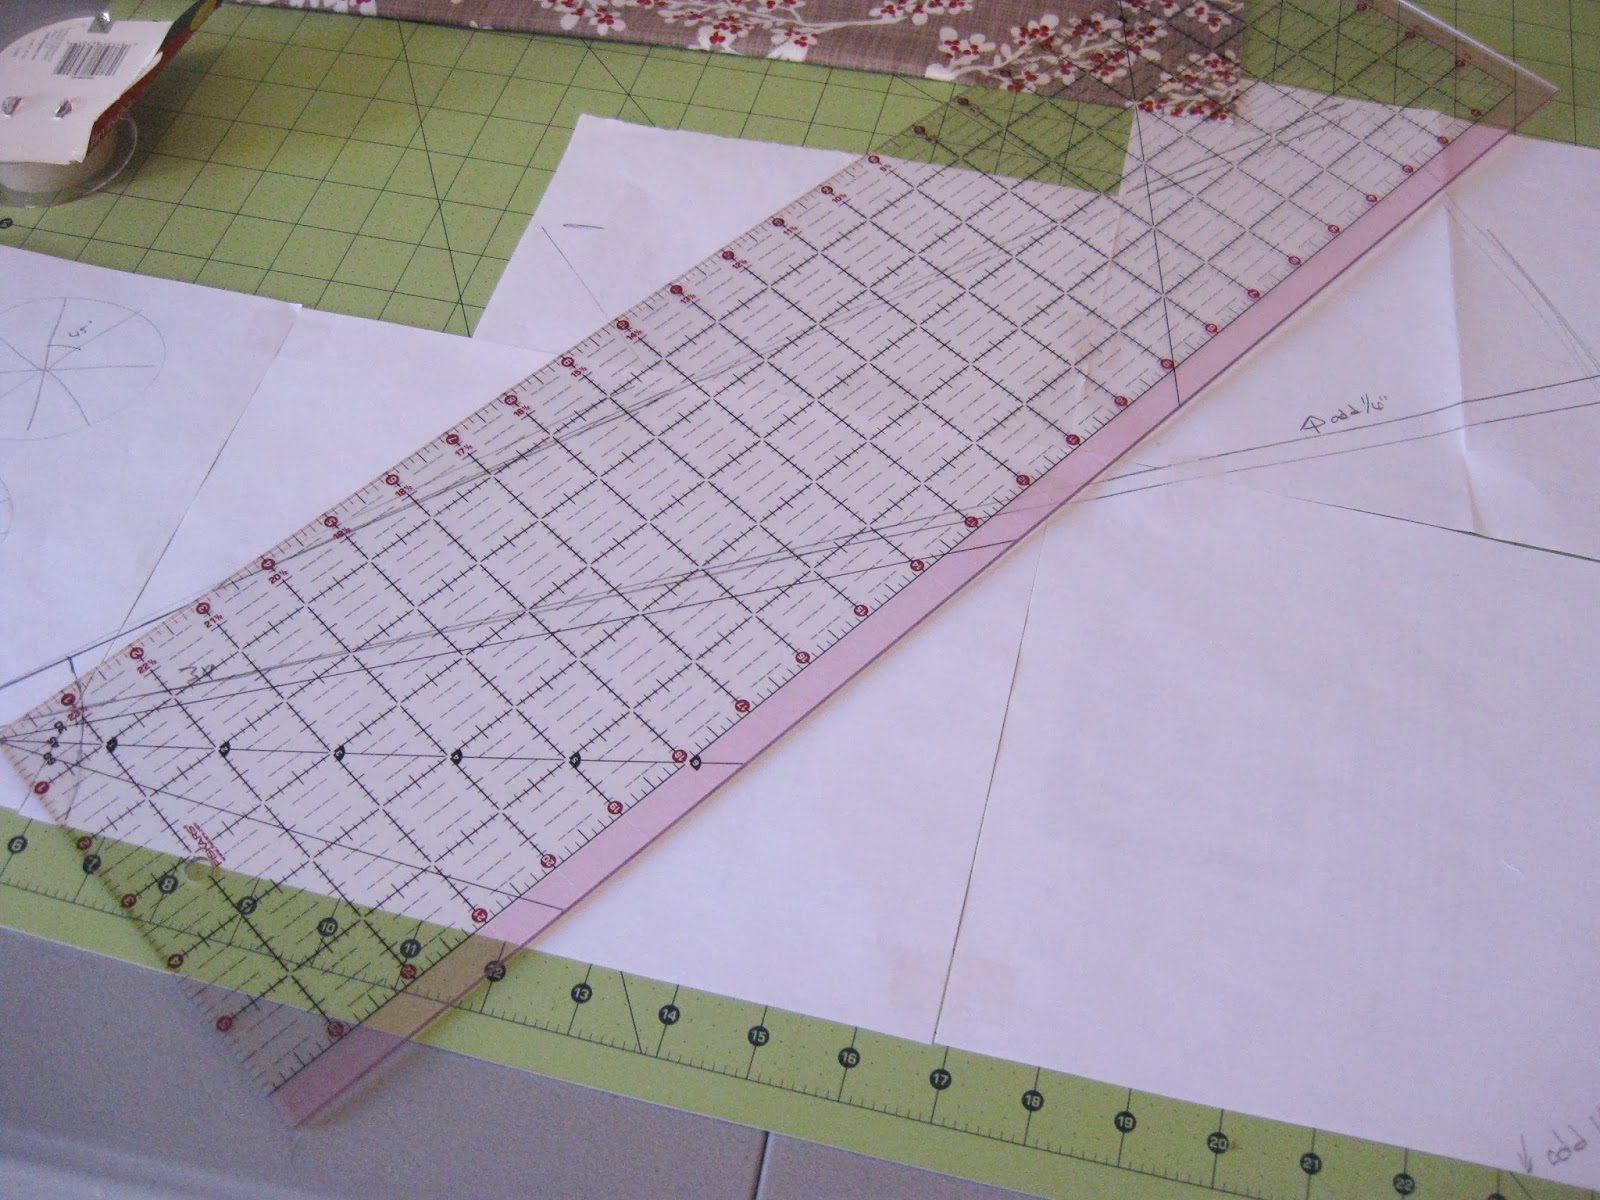
So I got out some paper. It would be helpful to have a big chunk..but I taped several sheets together. and using my quilting ruler, marked off a 45 degree line.
 I decided I wanted this about 45" across when finished, so I used a pencil on a string, measured to 22" to draw the circle edge.

I added a 6" circle opening in the centre point by using the pencil on a 3" string to draw the circumference.
 I cut this out and used it as my template.
Fabric requirements.. I used .6 metre of two different fabrics.

That gave me 4 wedges of each fabric. I used one side along the salvage...because it is round, there are going to be bias edges somewhere, and that fit the best on the fabric I had.
I sewed the wedges together, alternating the fabric, and leaving one segment open.

Once they were all sewn together, I sandwiched it with some batting and backing and quilted it up. I used a straight line echoing each seam, and a curvy line down the centre of each wedge.
On the opening I just turned under a 1/4" and stitched it closed. On one side I added 3 elastic ponytail ties for closures. (they were bulky and hard to sew in...I might try something different, or smaller ones next time)

Because I am lazy, I used store bought bias binding to finish the centre and outside edges.
 I added some big buttons for the closure.
 Anyway, I am really happy with how this turned out...I love it..I hope they do too.
Linking up to TN&TN

I hate to sound like the Grinch...but I am not really a Christmas person (sorry)..so didn't really like all the really Christmassy fabric, BUT...I saw this...and it was perfect!!

So then on to the planning stage! As I lay in bed one night I realized that the math was really pretty simple. If you cut a circle into 4...you have a 90 degree corner in the middle..divided into half makes a 45 degree corner and 4 wedges on each half of the circle.
If I wanted 3 wedges on each side....that would make each corner 60 degrees instead of 45 degrees, or I could make 6 wedges of 30 degrees! (easy peasy...right)

I know this is probably pretty obvious to most of you...but it was a true moment of clarity when I realized how simple it really was.
So I got out some paper. It would be helpful to have a big chunk..but I taped several sheets together. and using my quilting ruler, marked off a 45 degree line.

I added a 6" circle opening in the centre point by using the pencil on a 3" string to draw the circumference.

Fabric requirements.. I used .6 metre of two different fabrics.

That gave me 4 wedges of each fabric. I used one side along the salvage...because it is round, there are going to be bias edges somewhere, and that fit the best on the fabric I had.
I sewed the wedges together, alternating the fabric, and leaving one segment open.

Once they were all sewn together, I sandwiched it with some batting and backing and quilted it up. I used a straight line echoing each seam, and a curvy line down the centre of each wedge.
On the opening I just turned under a 1/4" and stitched it closed. On one side I added 3 elastic ponytail ties for closures. (they were bulky and hard to sew in...I might try something different, or smaller ones next time)

Because I am lazy, I used store bought bias binding to finish the centre and outside edges.


Linking up to TN&TN
It's really lovely and who wouldn't want a beautiful gift made with love.
ReplyDeleteI'm with you on the winter fabrics. Your tree skirt is beautiful, and no, most people would not have figured it out on their own. Good job.
ReplyDeleteI love it! Great work. And I don't think using store-bought bias binding is lazy at all.
ReplyDeleteIt's beautiful! And a perfect choice of fabric.
ReplyDeleteIt's lovely - and sure to be loved!
ReplyDeleteIt's beautiful, Flo! The fabrics are so elegant I'm sure they will love it -- if not, send it to me! :)
ReplyDeleteI think it is gorgeous! My tree skirt this year is more winter than Christmas. Not that you can even see it because of the gifts. I think some Christmas fabrics are way too busy, and I do like Christmas. You did a beautiful job.
ReplyDeleteWell; I think it is wonderful Flo!! I love the fabrics and your tutorial is fantastic!I needed it...
ReplyDeleteYour tree skirt is just wonderful. And kudos for figuring it all out. A lovely, elegant tree skirt.
ReplyDeletewell that sure turned out great! i am sure they will love it
ReplyDelete