Sunday, June 30, 2013

Slabs for Calgary

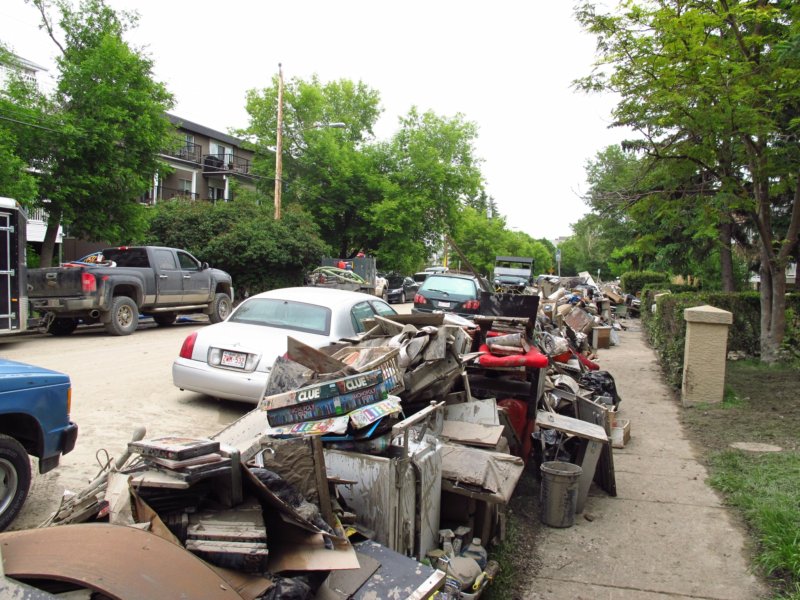
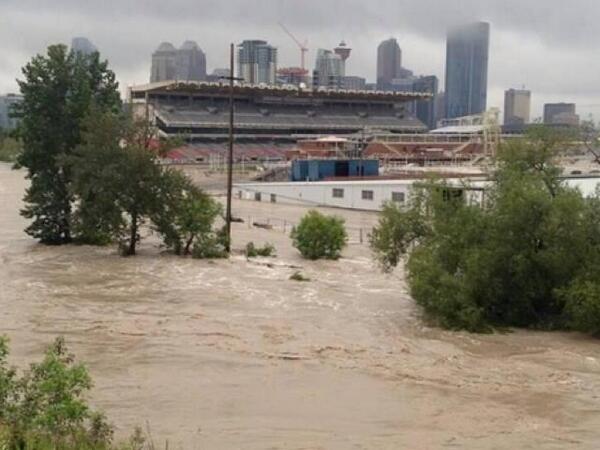
Thank you for all the kinds words and support you have given for my daughter, who was flooded in Calgary.

Many, many people lost their belongings in this disaster, and of course, quilters being who they are, have joined together to make quilts to give to the flood victims !! Such great people!

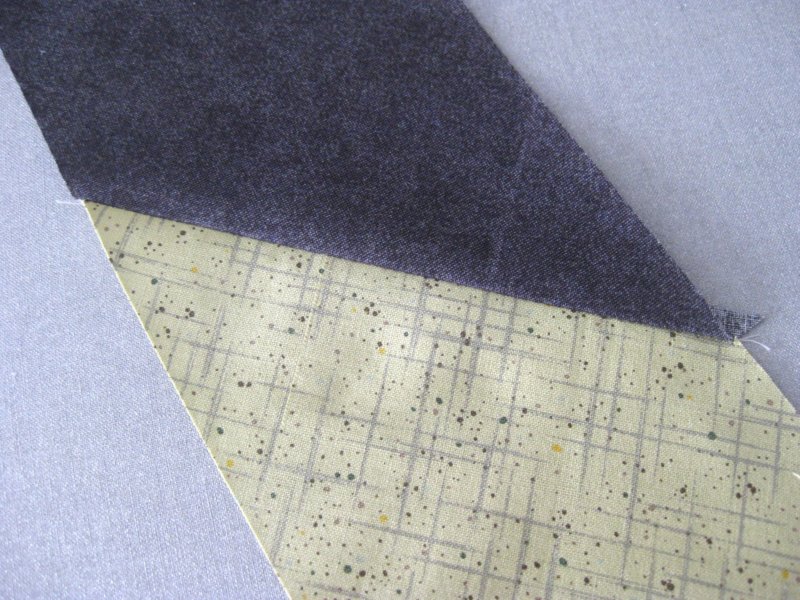
Anyway, Cheryl from Dining Room Empire Blog has sent out a call for "Slab Blocks". She has directions on how to make them on her page, or you can find info and directions on the Saskatoon Modern Quilt Guild page. If you are near Saskatoon, the Modern Quilt guild here is collecting them to send out.

Cheryl, and an army of volunteers in Calgary,  will put them together and quilt them.

Here is what I managed today.. they are 15.5 inch blocks

Every block helps..

They are really pretty easy and fun..and use up a pile of scraps..

Even for me, who has trouble with improv. type piecing  managed to make a few!

I don't have a ton of scraps, but still was able to pull some together....and I obviously use a lot of yellow!!

Wednesday, June 26, 2013

Flood Update

Thank you to all of you who have sent kind words and thoughts about my daughter's apartment flooding and her evacuation. Some have asked for updates, so I thought I would share some of this with you. I have not been getting any sewing done, as we went out to Calgary to help her.


This is a view of the street outside her building.. everybody's stuff all mixed together..

She is wandering around, viewing what is left of her belongings..

Her apartment is at ground level in Mission, one of the hardest hit areas of Calgary. It is a beautiful area, right beside the Elbow river. When the Elbow overflowed it bank, the area flooded, and her apartment was flooded right up to the ceiling!! Hard to imagine, isn't it? Fortunately, she and her boyfriend, and the puppy are all safe...but she lost everything.

This is what the inside looks like now..


The patio window is what you see lying on the living room floor. The apartment door is gone!  And the hardwood floor is heaved about 2 feet.  And it is all covered in several inches of mud and slime! It was horrible.

We had just replaced the fridge, stove and dishwasher 2 weeks prior to this...they didn't fare too well...

But the fresh new green paint survived !! Speaks well of Benjamin Moore paint , I guess!

I had mentioned that 4 of my quilts were floating around in the flooded apartment. Well we did find them...in there...

but they were very slimy, and had been sitting wet for a day on the lawn. We were advised that all these belonging should be destroyed as the water was contaminated with sewage and chemicals, and items would not be usable. We did soak one small special scarf in bleach a few times, but had to rinse it over and over and over, and there was still mud coming out. I can't imaging trying that with a multi layer quilt. So they are all gone!

Sad...but replaceable.

I can't say enough good things about the volunteers and people of Calgary!! They were amazing. Volunteers moved most of the heavy, wet furniture out of the apartment. Volunteers were there all day...for several days offering sandwiches, home-made cookies, bottled water and a kind word!
We had many people stop and ask if there was anything they could do to help. We certainly did not feel alone!

It was good that we could go to Calgary to help, and give her a big hug.
So now, the clean up begins! It will take several months, but it is starting now. They are telling her that there will be disaster relief money to help . It will all be brand new when it is finished !

 She is coming to terms with this, although she said that she doesn't have much make up, so isn't wasting it right now, because it just gets ruined when she cries!  Awww. It is getting better though. She is staying with some very good family friends, who will take good care of them. So we are lucky that she has a safe place to live, and the rest will just take time.

We are home again tonight, and I guess I had better get busy remaking those quilts!!


Friday, June 21, 2013

Flood Watch

My daughter lives in Calgary. She was evacuated last night from her apartment, so she is safe and dry ...with her puppy, Zoe.
We have heard nothing yet about how much damage or flooding there was in her apartment, she is at below ground level, so is very likely under water.
This a a picture of the Calgary Stampede grounds, which is just across the river from where she lives.
View image on Twitter

Wednesday, June 19, 2013

If I can do triangles...why not diamonds?

I really love the HST quilt that I finished for my nephews wedding. And I really enjoyed the process too! For the most part the points all matched up, and it went together nicely.

So....I have always loved "Diamond" quilts, and thought that if I could do HST...why not try diamonds? I picked up some inexpensive fabric to try this out. I read lots of blogs, and tutorials. Some of them had complicated ways to calculate the size of the diamonds, but I didn't have a particular size in mind, so went an easier route.

Start by cutting 4" strips, WOF, of several fabrics..

Then cut the end of the strip off at a 45 degree angle. There are 2 ways to easily get that, both actually doing the same thing...just how you look at it.
One is to line up the strip on the cutting mat and use the 45 degree line on the cutting mat...

The other is to use the 45 degree line on the ruler..lined up along the bottom of the strip.....
 I think this is probably more accurate.

Either way, you end up with a strip with the end angled off at 45 degrees.

Next, place your ruler so the 45 degree angle that you just cut is along the 4" line on your ruler, and cut..

And you have a diamond!!

Now, make a gazillion more!

Lay them out in a pleasing pattern...or if you are like me...spend a few hours tweaking the random arrangement!

Then comes the sewing together!! Remember that the edges are on the bias, so handle very carefully, or they will stretch. When you sew the rows, you are actually taking the diagonal row.

I found it difficult to keep everything in order. I cant count how many times I ripped this apart and tried again :(

When you put the diamonds together, right side facing, be sure to overlap the pointy ends

 so your seam starts in the correct place..

It should finish with an even edge...

not like this... (yes, I ripped a few of these out too !)

When you are sewing the rows together, the good news is that these rows stretch because they are bias edges, so you can ease the points to match up. The bad news is that these rows stretch, so it can be challenging!!

All in all, it is going together pretty well..

But there are a couple of mismatches in the middle!  ...can't explain this one!

I think I will just chalk it up to practice and experience! Maybe I could even say it adds some home made character...right???

Anyway, that is what I am working on this week.  How about you?
I am linking up to TN&TN

and Lee's WIP Wed over at Freshly Pieced.
                                                      WIP Wednesday at Freshly Pieced
Go check them out!


Monday, June 17, 2013

Scrap Basket

There was a great tutorial last week over at Sew Sisters Quilt Shop on making a fabric basket. (Oh and while you are there, you should check out some of the great fabric on sale in The Sew Sisters Quilt store.!!)  p.s. They are Canadian too!! :)

Anyway, the tutorial was the Kona Club Challenge - Quilted Fabric Basket by Tabatha @ Bending Pins. 
Such cute baskets! And a give away too!! 

But, seeing as how I never win the give aways ....I thought I would use up some of my scraps and try one of these out. 

Rather than doing a real log cabin, like the tutorial, I pretty much just randomly sewed little bits together ...

till I reached 9.5" square. I have a 9.5" square ruler, which makes it really easy.

The only thing I added for this one was some Buckrum (really stiff interfacing) in with the batting, to make it more stable and stand up better. 

I just quilted the sides by stitch in the ditch sort of randomly wandering around...see I can do random!!


Then, I followed the instructions in the tutorial for the basket construction. 

I think it is pretty cute..I am going to use it to throw my scraps into...that I am saving to stuff my batting bears!

And my DH was so impressed, he asked if I could make him one to store his old golf balls! (I don't ask why he is keeping old golf balls...after all I have baskets full of tiny little scraps of fabric....enough said!)

So here is the manly version...to store golf balls! 

I added some handles on this one, and just folded the top edge over, instead of adding binding.

Check out the tutorial, it is easy to follow, and makes such great, fun baskets!!


Saturday, June 15, 2013

babysitting

We were babysitting our grand daughter for a couple of days, and she loves to colour...
And wanted me to colour with her!

This is her picture (I think it is Grandpa!).....

And this is mine....

O.K....I did get a little carried away...

but it is good FMQ practice!

Friday, June 14, 2013

HST finish!

I finished the HST quilt that I am making for my nephews wedding (and with a few weeks to spare...which is very unlike me !!)

It is made starting from 5" squares, sewn and cut into HST. I love how these colours mix together!  (I love it so much that I am making one for myself too !!LOL)

The backing is lime green..with a row of extra HST blocks..

I used the same fabric for the binding and the backing...

I quilted it with straight diagonal lines, echoing the seams. This avoids trying to sew over where the points come together, which gets pretty thick and bulky.

Anyway I am happy with it, and will get it wrapped up and ready to go to the wedding!

That is my Friday Finish ..so will link up to Finish it up Friday at Crazy Mom Quilts 

and TGIFF.
M-R  is hosting TGIFF over at Quilt Matters this week.. so go check it out! :)


Thursday, June 13, 2013

Hand stitching?

Yesterday I went to a Hand stitching class, taught by my friend, Monika, from My Sweet Prairie. Her work is amazing! She is very excited to share her knowledge and love of thread. And she was very patient and kind.....I think if there was a grade for this class, I would have failed! But Monika encouraged me to keep trying till I actually made a French Knot...it took awhile!! :)

She had a great handout so I could keep practising at home...if I get brave enough!

We also had a variety of thread to try out..from perle cotton to sparkly thread and even some silk ribbon.

Embarrassing as it is , this is what I produced in 2 HOURS!!

My very favourite was the silk ribbon...

So when I got home, I thought I would try out my new found skills (or lack thereof) on one of my batting scrap bears...

I admit...I am pretty much a failure at hand stitching  :(
Good thing I can sew pretty well with a machine!!